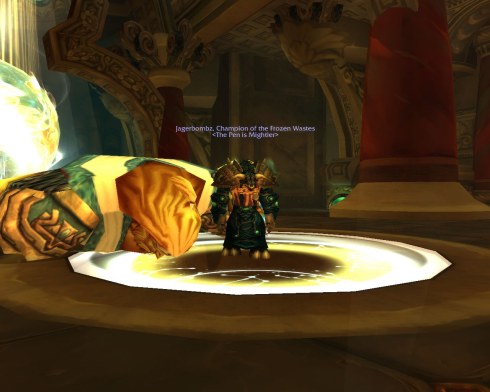
So the guild has finished most the majority of the 10 man raid content in WotLK.  Among this bunch of Champions of the Froze Waste there is a bit of boredom now that content has been done and loot has been had.  In an attempt to spice things up we decided to try something we have done off and on for the past few weeks…Sarth and a drake.

The run started well.  We took down the left and right drakes, leaving the egg drake for our attempt.  Once we got to Starth things began to get shaky.  First, one of our off tanks wandered into his agro radius and caused us to all run out of the instance while our main tank took the death. 

Once back in the instance, our boomkin made a bee line for the main tank for little t-bag for good measure, but he also entered Sarth’s agro radius causing the raid to run out of the instance once again.

This was going to be a long night.

Our first “real” attempt was a mess.  We had the off tank keep the drake at the back of the island but he adds got all over the place and killed the heaelers pretty quickly.  We then decided to have the off tank keep the drake next to Sarth, allowing him to pick up the adds qucikly since they were spawning from the middle of the island.  This plan worked much better and the drake was down, but focus was lost and the adds got the best of us…again.

The next attempt went much like the first, except we picked the adds up after the drake death much better and burned them down and started on Sarth.  Four minutes later Sarth lay before us dead.  Sarth +1 done.  Next week we will do Sarth +1 again, and might think about Sarth +2, but that might be pushing it for our gear/skill level at this point.

teatime1

Feel free to use this for all your T-Bag needs.

cup_of_tea_21We have all been there before, without knowing what happened you are face down.  Next thing you know one of your friends runs up, gives a giggle and T-bags you before you can click the rez button.  Now, I am not saying this is a bad thing, I have given my number of Liption dips, but there are some times where a Boston Tea Party is not warranted.  Let’s look at a few examples.

Situation One: The raid has taken down Patchwerk and you are working your way to Grob when suddenly a slime just taps your hit box and your are dead.  A fellow raid member runs back through the slimes and positions himself to serve you a cup of Earl Grey.  TB or not to TB?

TB, most definitely. One’s inability to navigate the slimes has been labeled “Frogger Fail” and deserves a bevy of sack action.  Be warned provider of the bag though, if not careful, you too may end up on the receiving end of a cup of steaming green tea.

 Situation Two: Rolling in Wintergrasp you find the guy next to you gets one shotted and falls to the ground.  You turn just in time to see the attacker and unload on him, killing him instantly.  You drop down and invite both people to a Boston Tea Party.  TB or not to TB?

This situation is one of the gems of the tea bags.  If placed correctly, not only can you T-bag the attacker, but also the n00b who didn’t see the attack coming.  Advantage to the double bagger.

Situation Three: Your raid is the middle of the Hiegan the Unclean when the one of the melee DPS’ers goes down.  The tanks maneuvers Heigan back to the fallen raid member and performs the very rare “mid-boss fight/DDR T-bag”. TB or not to TB?

Being one the ballsiest T-bags there is; one must be careful to not wipe the raid for some simple retribution.  Granted, the stories to be told from that raid wipe will be held in such glory that one cannot help but execute such a high risk maneuver.  

Situation Four: You are a healer.  You have total control over who lives and dies.  You have been T-bagged one too many times this evening and the only thing on your mind is revenge.  You look for a victim and decide then and there not to heal them.  As they ask where the heals were, you calmly walk up to the corpse, respond with “must have been lag” and dip your bag all over the guy  To TB or not to TB?

TB of course…advantage healer.  That will teach them to T-bag me!

wowscrnshot_022309_000908

malygosUpon entering the Eye of Eternity you face Malygos the Spellweaver, Lord of Magic and creepy old uncle of the Dragon Aspects.

Let’s take a moment to get to know our raid boss.  Malygos wasn’t all bad at one time.  He was a happy go lucky kind of dragon, you know the kind of dragon you could hang out with, have some drinks and get high with while he tells you dirty jokes all night.  That was until Deathwing used a little thing called the Demon Soul to exterminate the entirety of the Blue Dragon flight during the War of the Ancients.  From that moment Malygos went into seclusion and started his downward spiral into insanity.

After playing a small role in freeing Alexstrasza from the orcs, Alexstrasza resurrected most of the Blue Dragon Flight, but the emotional scars of the past still haunted Malygos and he fell into complete insanity.

Upon looking upon the world of Azeroth Malygos came to the conclusion that all magic users must be eliminated, yes even the peace loving tree hugging shaman.  At this point we find ourselves in the middle of the war between the Kirin Tor and the Blue Dragon flight and it is our duty to destroy Malygos.  Why on Azeroth the Kirin Tor isn’t taking down Malygos themselves is beyond me, but who am I to judge. 

Entering the EoE you will find yourself on a platform in the middle of vast nothingness.  When you are ready to engage Malygos, click on the orb in the middle of the room to start the encounter.   

The Malygos encounter is made up of three phases…

1)     OMG how am I supposed to heal that phase?

2)     Why don’t I get to ride on a hover disk phase?

3)     1…1…2…Oh I was supposed to heal phase?

Phase One: OMG how am I supposed to heal that phase?

Phase one is a pseudo tank and spank.  During the fight sparks will be coming from the four corners of the zone.  If the sparks are mot killed before they get to Malygos he will get a 50% increase in damage for 10 seconds pretty much allowing him to one shot most tanks.  Be aware of where the sparks are killed, because they need to die near Malygos and the raid since they offer a DPS boost that is necessary for beating the 10 min enrage time.

Along with the sparks, every 60 seconds Malygos will cast vortex tossing the entire raid into the air, swirling around him causing 2K damage a second to everyone.  During this time only instant heals can be cast.  Healing through this is tough as a shaman, but still doable. 

When first tossed in the air, riptide yourself, the HoT will help cover some of the damage but not all.  Then after the riptide cool down, cast it on the lowest health person, with special focus on the tank or the other healers.  Just before you land cast Natures Swiftness and Tidal Force.  This will allow you to cast an instant chain heal with an almost guaranteed crit just as the raid lands back on the platform.  Due to the cool downs on these two abilities, you will only be able to do this once so if you want you can wait for the second or third vortex to do this.  Either way, cast the first chain heal off the tank and the spam chain heal to top the raid off and everyone reassumes their positions.

Phase Two: Why don’t I get to ride on a hover disk phase?

Once Malygos gets to 50% he will take off and circle platform while mobs on hovering discs of doom come down and attack the raid.  As a healer, you will never get to jump on the discs to attack the mobs above you.  Your job is to make sure all the range DPS and the tank live through phase 2.  You will need to enter the bubbles of magic protection to help reduce the damage of the mobs as well as Malygos’s  AoE damage.

Once the all the adds have been destroyed Malygos will get really pissed and start phase three.

Phase Three:  1…1…2…Oh I was supposed to heal phase.

Phases three begins with the destruction of the platform, but have no fear, the red dragon flight has come to help out.  Everyone mounts up to a drake and everyone has the same abilities.  Because of this, your role as a healer in phase one and two may change to DPS during phase three.  Normally, the raid can be healed by the abilities of one drake rider while the rest DPS.  If coordination is not that great, having two healers will do.  If you are DPS, you will hit 1, 1 then 2 the wait for 60 energy and repeat casting shield on yourself if Malygos targets you.  If you are healing you will cast the HoT on 4 people and then cast the AoE heal.   The whole time you are doing this you will be rotating around Malygos counter clockwise to avoid damage.  If done perfectly, you will need 2 minutes to do down him before the enrage timer, but any extra time you can get yourself from phase one will be a bonus.

Assuming you have gotten through all phases, and Old Blue is dead, Alextrazsa will come in and bless you and your raid group with the gift of phat lewt.

Misc Tips:

1)     Toggle “v” to show the health bars above the mobs.  This makes it much easier to see the sparks and the lords on the hover discs.

2)     Make use of Natures Swiftness and Tidal Force for helping the vortex healing.

3)     Have druids use bark skin and death knights should use magic shell to reduce the amount of damage during vortex.

4)     Have everyone buff up their stamina so their total HP is over 20K.  This will provide good survivability when landing after vortex.

I have been reading CAD for a number years now and have been impressed with not only the humor, but the continuing story lines.  Every so often though there is a comic that when I read it I pee a little.  This latest one caused a small quarter sized wet spot on the old dockers.

20090216

I personally love frame two.  Pretty much Jager’s reaction to any carpet soiling.  Thanks for the laughs Tim!  CAD Comic

The weekend went by too quickly.  I decided to take it easy on the WoW end so that I could catch up on some reading and some sleep, so instead of 5 hours of WoW a night I only spent 4 hours.  I got the warrior to level 35 and equiped the epic Fiery War Axe and had Crusader put on it.  Thanks to Namsy, my druid friend for sending me the Axe prior to quiting the game for the 5th time.

Jager spent some time in Heroics and Naxx.  We ran heroic Gundrak to try to re-build the confidence of our Icy DK tank, but just ended up giving him a much bigger complex than he had when he entered.  It is all part of my master plan to break him so all he focuses on is his Ret Paly.

The Pen is Mightier finished up Naxx.  I was very glad to see that the 10-man version of Saph was fixed.  The raid damage taken this time was reasonable and not OMG WTF that it was last week.  Kel also was nice enough to drop me his mace so that gives me 4 weapons to choose from on a nightly basis.

After Naxx, we rolled ovet to EoE to take on Malygos.  Each attempt was better than the other and we got the drake phase but hit the enrage timer each time.  We will need to work on our spark managment to bring him down faster.  A big thanks to Kurosawa, our new Holy priest for coming along.  It made life much easier on the resto shamans.

This is part three of my Resto-Shaman guides to Naxxramas. These guides are designed with the Resto-Shaman in mind, but may be beneficial for any healer. These guides are a condensed overview of each Naxxramas encounter allowing the Resto Shaman to understand their roll in the raid and are not a full instance guide.

You have conquered your fear of spiders, you have defeated the plague and now it is time to for you to step into a big pile of flesh and goo known as the Plague Wing so trap on your boots and prepare to get messy.

Naxxramas: Abomination Wing

Trash: The first part of the Abomination wing’s trash is made up of, well, Abominations and slimes and some weird scientist. They tend to disease their targets so make sure to be quick with the cleansing. The hardest part about healing through the trash is the effect from the slime rivers that reduce health and mana by 50%. If you or your tank is not paying attention you may go out of mana when pretty quickly and that may lead to a wipe. Just make sure to mana up once you get past the rivers to be safe.

Patchwerk: Patch is the first Abomination wing boss and the test to prove if you are ready to continue into Naxxramas. He has a 6 minute enrage timer so he needs to be killed as quickly as possible. Healing this encounter can be very strenuous for a new healer.

Only the main and off tank will be taking damage, but they will be taking a ton of damage. The off tank will be taking the most damage from deadly strikes while the main tank takes the normal hits. Your goal will be to keep up with the damage to keep the tank topped off as much as possible. This can be done with either big bang HW heals, or quick LHW heals with earth shield on your target. You CAN chain heal this, but normally it is not needed. I will only use chain heal if my other healer needs help on the other tank.

While the DPS is racing to kill Patch, you are in the middle of a mana marathon. Unless you have a ton of MP5 and a big mana pool, mana will be an issue. I found that it is best drop mana tide at 65% and then a mana pot when you are back down to 50%. Try as much as possible to not spam heals allowing you to regen a little more mana, you will need every bit of mana you can get.

Grobulus: Not only is Grobulus a pain in the butt, he is also the lamest looking boss in all of Naxrammas. During this fight the tank will kite Grob around the room. During this time there are two things to watch for. The first is the Injections that Grob puts on a random raid member. DO NOT CLEANSE THIS! If you do there will be an AoE poop cloud that will cause damage to anyone near it. When someone gets the injection they will run to an area behind where Grob was and the wait for the effect to drop the cloud out of the way of the raid. Your job will be to heal that person as they come back since the injection will have taken a nice big chunk of their health away.

Grob will also spawn an add for everyone that is hit with his slime spray…which should only be one since the spray should only be aimed at the tank. Make sure to keep an eye out for the slime and avoid it and heal the off tank assigned to pick up the slimes.

As for totems I tend to drop them in the middle of the room. This allows for the best chance for the raid to get their benefit as they move around the room.

Gluth: The sweet little puppy of the abomination wing. During this fight you will be asked to do more than just heal, you will have to help on puppy chow duty.

During the fight zombies will spawn in the back and if they make it to Gluth he will eat them and regen health, so two or three people will be in the back of the room gathering up the adds and slowing them down. Your job will be to keep these people healed as well as aiding in the zombie round up. Make sure to have earth bind totem up to slow the movement speed of the zombies and nuke the random runner with frost shock to get them back to the kite group.

During the fight, Gluth will cast decimate, reducing the raids health to 10%. Make sure to get everyone up as fast as possible (Chain heal and LHW for the win). At this point the raid will be AoE the zombies that are now on a bee line for Gluth. Make sure to have earth bind down and drop your fire elemental for added damage. After decimate and all the zombies have been killed or eaten, the cycle starts over and you will head to the back of the room and start the process of gathering zombies again. Normally there will be two decimate cycles during the encounter.

Thaddius: The final boss of the Abomination Wing and the idiot check for Naxx. The first part will require the raid to split into two groups to kill Stalagg and Feugen at the same time. The make up of the raid will dictate which mini boss you heal. If you are the only raid healer, you will heal Feugen and his AoE damage, if there is a druid or a priest they are better to heal that fight and you can heal the single target damage on Stalagg. Either way, you will end up healing both tanks since they are tossed back and forth platform to platform.

Once the wonder twins have been killed, it is time to make the jump to Thaddius’s platform. Fail point number one is missing the platform and having to swim back. During the Taddius will cast a static charge on the raid (Positive or Negative) your job is to move to the side designated for your particular charge and keep moving each time your charge changes.

Depending in your raid, you will either just be healing the tank in really good raids, or spamming chain heal due to Fail point number two, people with two different charges damaging each other. Either way, healing will be a challenge but will be doable.

The last time I picked up a pure melee class to level it was my gnome rogue, but that was roughly four years ago. It seems that during this time I forgot some of the basic frustrations one has a melee class, the first being the total lack of healing spells. I found myself sitting down for a bite much more than I was planning on and was forced to take up first aide to make up some of the time lost eating. As a healer I never touched a bandage, but as a warrior I cannot see how you could live without it. First aide is a must for all new warriors or any other non healing class.

The second frustration I forgot about was runners. No longer could I sit back and nuke away, I had to take chase and pray for their quick death before the mob made their way back to their friends. After a few miscues I learned to use hamstring of shield bash to slow mobs down. In a few hours time it had become second nature for me to hamstring or shield bash anything on two legs just in case. Once I came to accept the weaknesses of the melee, I started the grind to 20. I will not bore you with what to do from levels 1 to 10. Just go out, get quest, kill things and pick up a shield that should drop in the first 5 minutes of your play time. From levels 1 to 20, shields are good to have equipped.

Leveling 10 to 20 was made easier due to being the beneficiary of my well to do main. The first thing I recommend, if possible, is the badge/shard shoulders that grant 10% exp bonus. Not only will they grow with you and be the best in slot item you will have, the 10% will visibly speed up leveling. When purchasing these keep in mind that you will want to get the plate shoulders even though you cannot wear plate yet. Once these shoulders are in the hands of your alt, the armor type will scale down to mail, allowing you to equip them right away.

As for leveling specs, I contemplated all three tress (Arms, Fury and Protection). I decided against arms since I did not have a good two hander available to me so I gave both Prot and Fury a try.

First I tried Fury. I had no idea how to spend my points but seemed to be doing ok. Things were dying fast and my rage seemed to be at an ok level, I stayed Fury till I was 17 then moved to Prot once I got a blue shield out of WC.

 The change to Prot was ok. The survivability was good, but I was killing slower, even with a beefed up revenge, so after 30 minutes I went back to Fury.

This time I did some research and hit tankspot for leveling guides. I took their Fury guide and started distributing the points into Cruelty, Unbridled Wrath and Commanding presence. From this, I continued on leveling to 20 and did very well.

The path from 1 to 20 isn’t that difficult and there is still no real “perfect” way to get there, but once you hit 20 the world opens up a bit and there will be more to start looking at talent wise. The next Project Panzer will dig deeper into the Fury tree, look at duel wield vs. sword and board and little tips on leveling that make life just a little easier on your path to tankdom.

Well, I do and those things are raid guides.  The guild has cleared all of Naxxramas and still there are not guides except for the Spider Wing and Plague Wing.  I will be attempting to get some work done soon on those guides.  Work has stepped up a bit and my free time has dwindled to pretty much just WoW time.   Please hang in there and I promise to have the rest of the Naxxramas guides up before Uldar arrives.  Until then, please enjoy these pictures of gratuitous cuteness.

hamster

kittah

sad_puppy-med

sleepy20kitty


Twisted Nether Wiki

Learn To Heal